Linking a ServiceNow App in Studio to a Github Repository
ServiceNow offers the ability to link a Studio application to a Github repository. This allows you to manage your application's source code in a version control system. This is a guide on how to establish this connection between your ServiceNow instance and GitHub without needing to disable two-factor authentication.
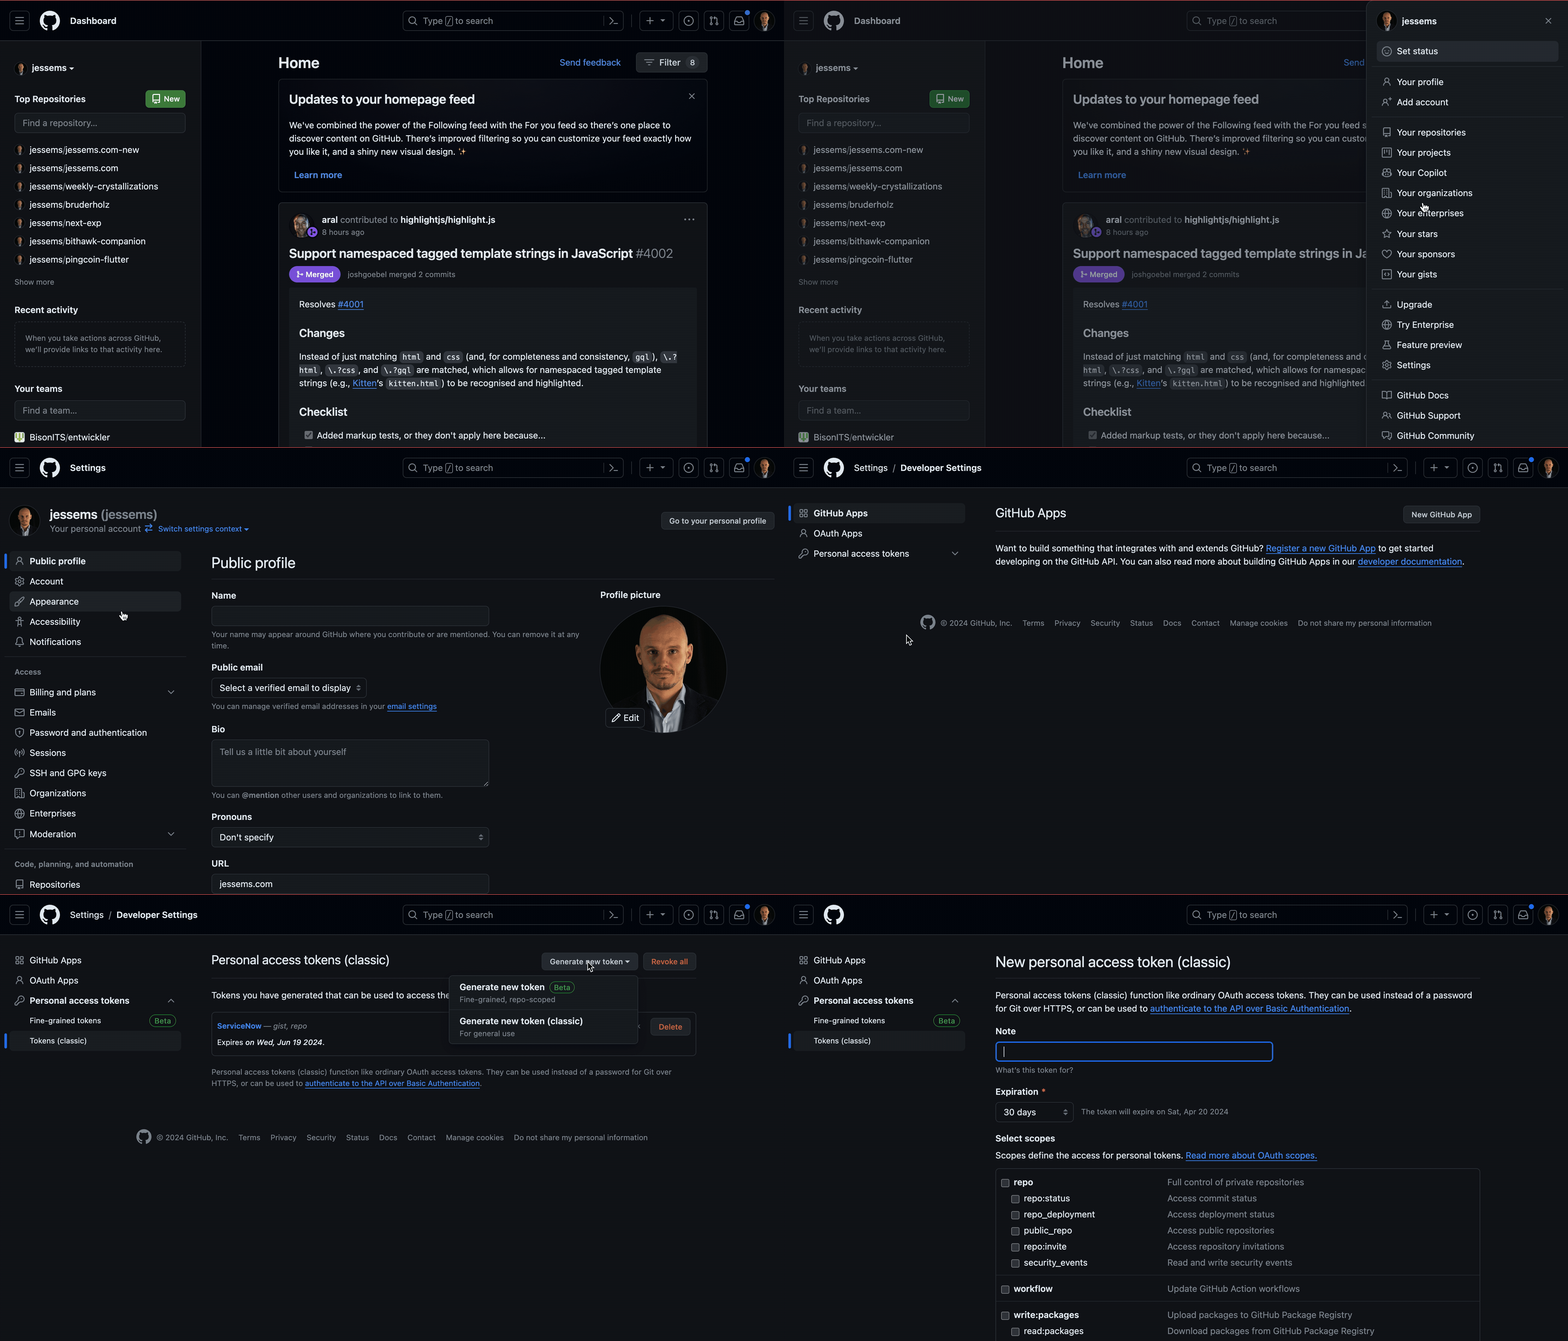
Step 1: Navigate to Personal Access Token Creation in Github
- Login to Github and navigate to your profile settings.
- Click on the
Developer settingstab and then click onPersonal access tokens. - Click on the
Generate new tokenbutton and choose 'Classic'. (You can also choose the fine-grained token, but as of this writing it's in beta, and it's slightly more involved to set up.)

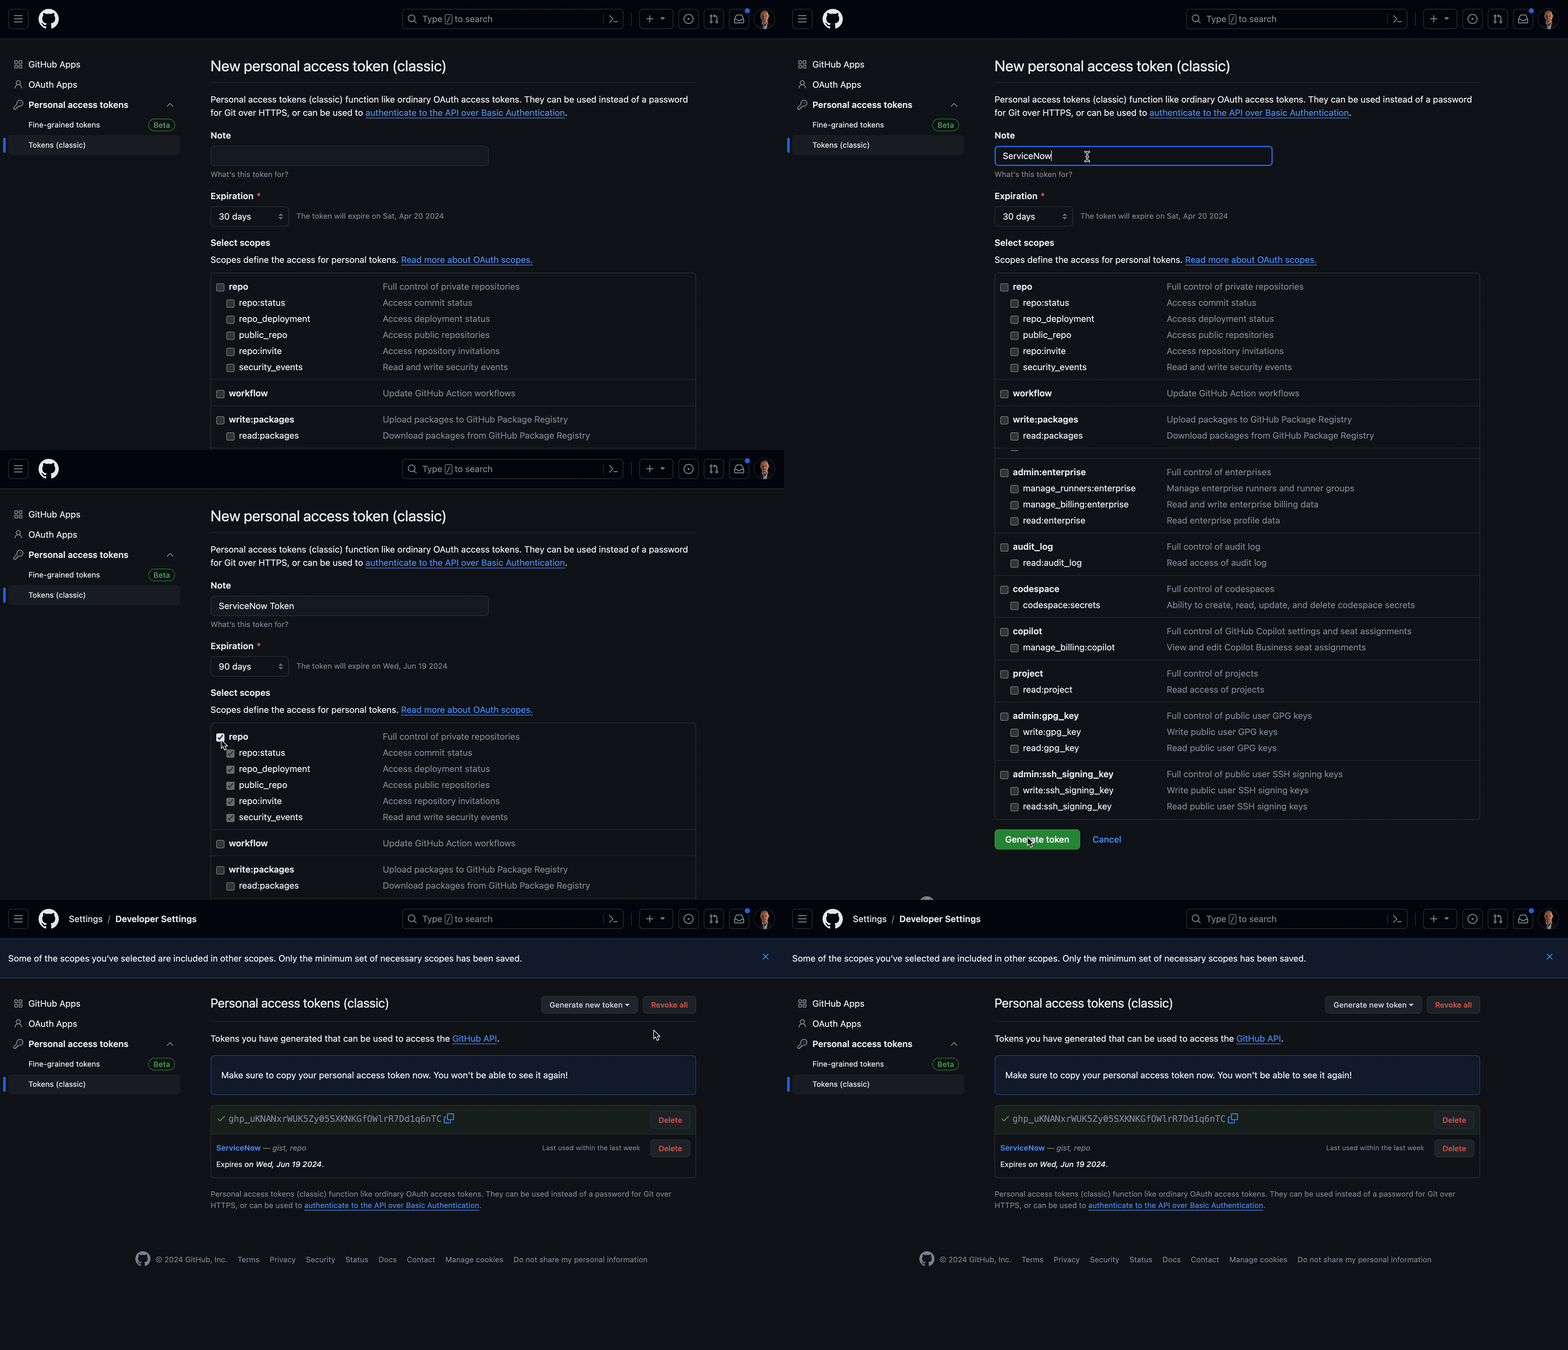
Step 2: Create a Personal Access Token
- Fill in a note for the token, such as "ServiceNow Token"
- Select the
reposcope - Click on the
Generate tokenbutton - Copy and save your token somewhere safe. You won't be able to see it again.

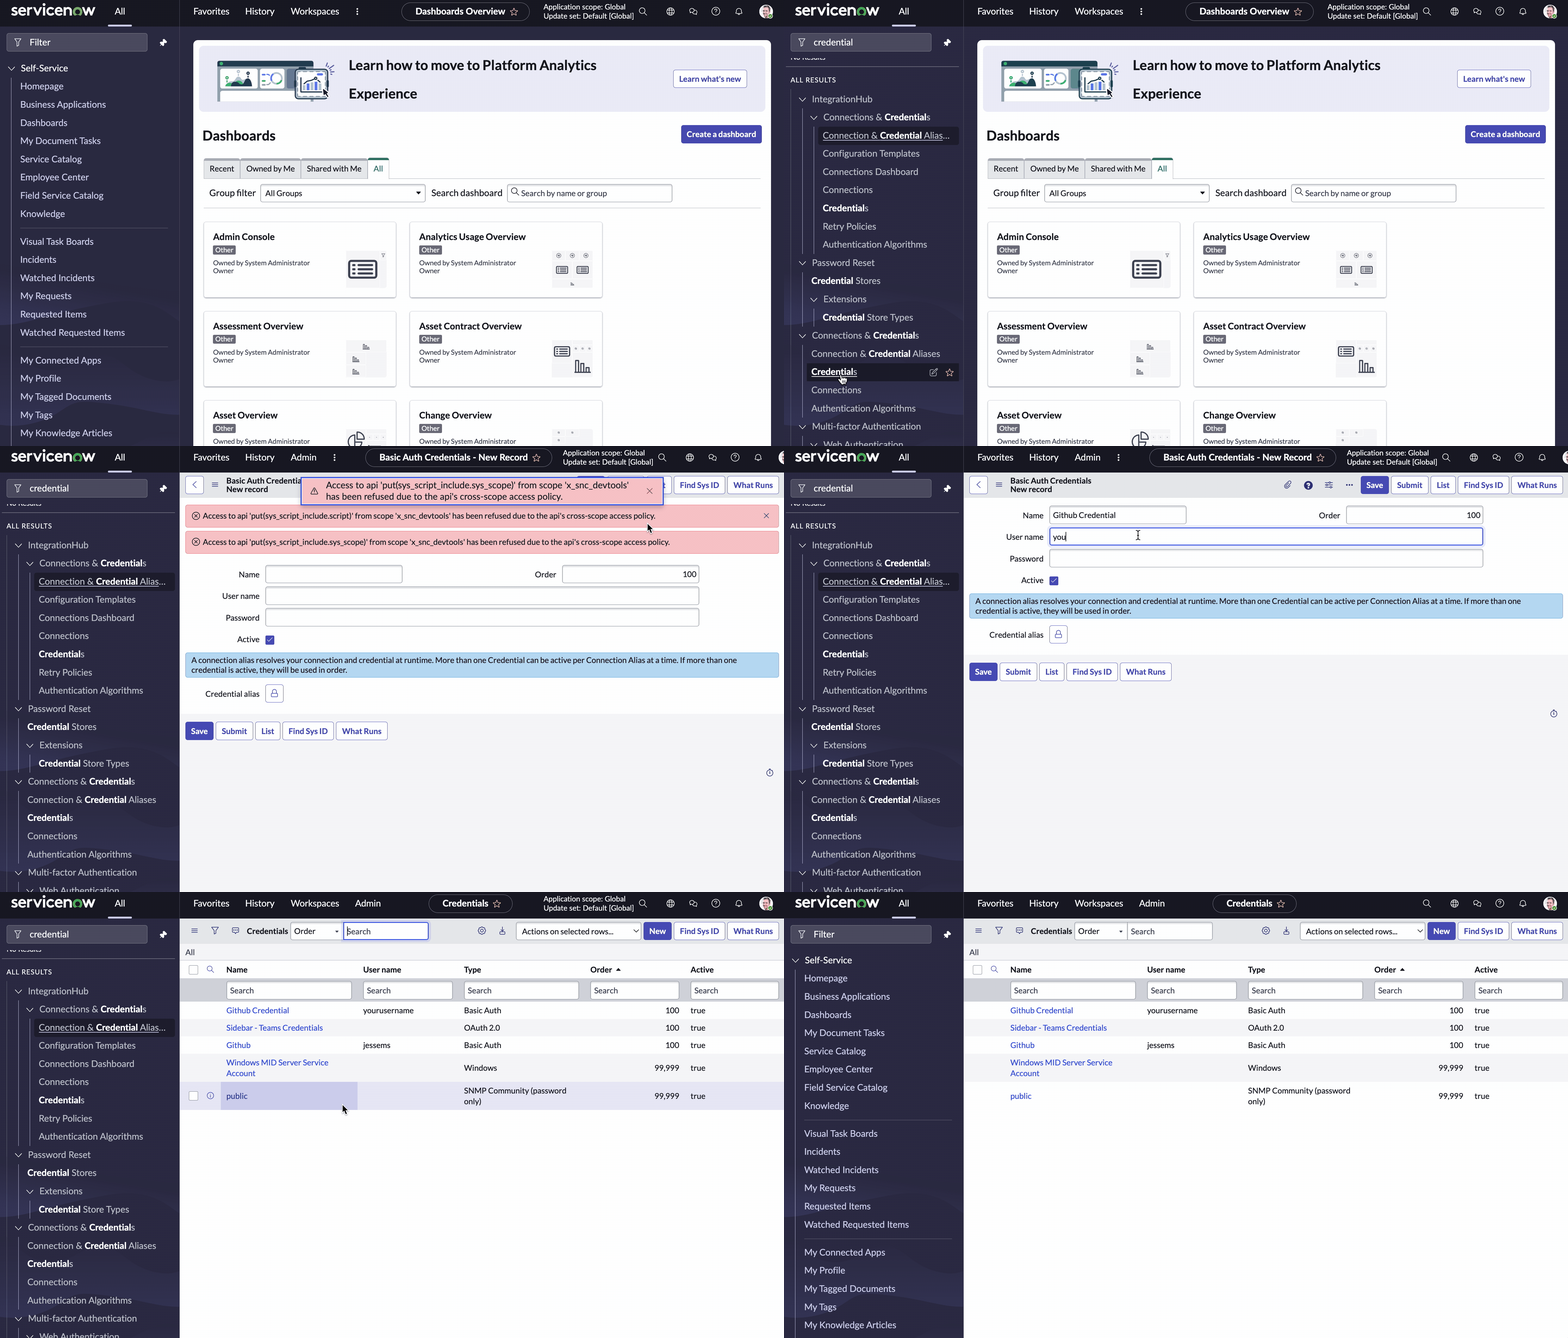
Step 3: Create a basic auth credential in ServiceNow
- Navigate to Connections and Credentials > Credentials in your ServiceNow instance and click the "New" button.
- As the type of credential, select "Basic Auth Credentials"
- In the subsequent form fill in the following details:
- Name: A name for your credential, such as "Github Token
- Username: Your Github username
- Password: The personal access token you created in the previous step
- Click the "Submit" button to save your credential.

Step 4: Link your application to a Github repository
- Navigate to System Applications > Studio in your ServiceNow instance.
- Click "Import From Source Control".
- Fill in the following details:
- URL: The https URL of your Github repository
- Credential: The credential you created in the previous step
- Branch: The branch you want to clone from
- Click Import.